Holp is an AI assistant that answers your customers’ questions on your website, using the information you already have. This guide walks you through setting one up from scratch, in the order that works best, so you can go from an empty account to a working assistant in an afternoon.
You do not need to be technical. If you can copy and paste, you can do everything here.
What you will need before you start
- A Holp account, and an invitation to the workspace you will be working in
- Your website address
- Access to your website, or someone who can paste one line of code into it for you
- A rough list of the questions your customers ask most often
That last one matters more than anything else. The quality of your assistant depends almost entirely on the quality of what you teach it.
Step 1: Find your way around
When you sign in, you land on Insights — the overview of what your assistant has been doing. On a brand-new account this will be empty, which is normal.
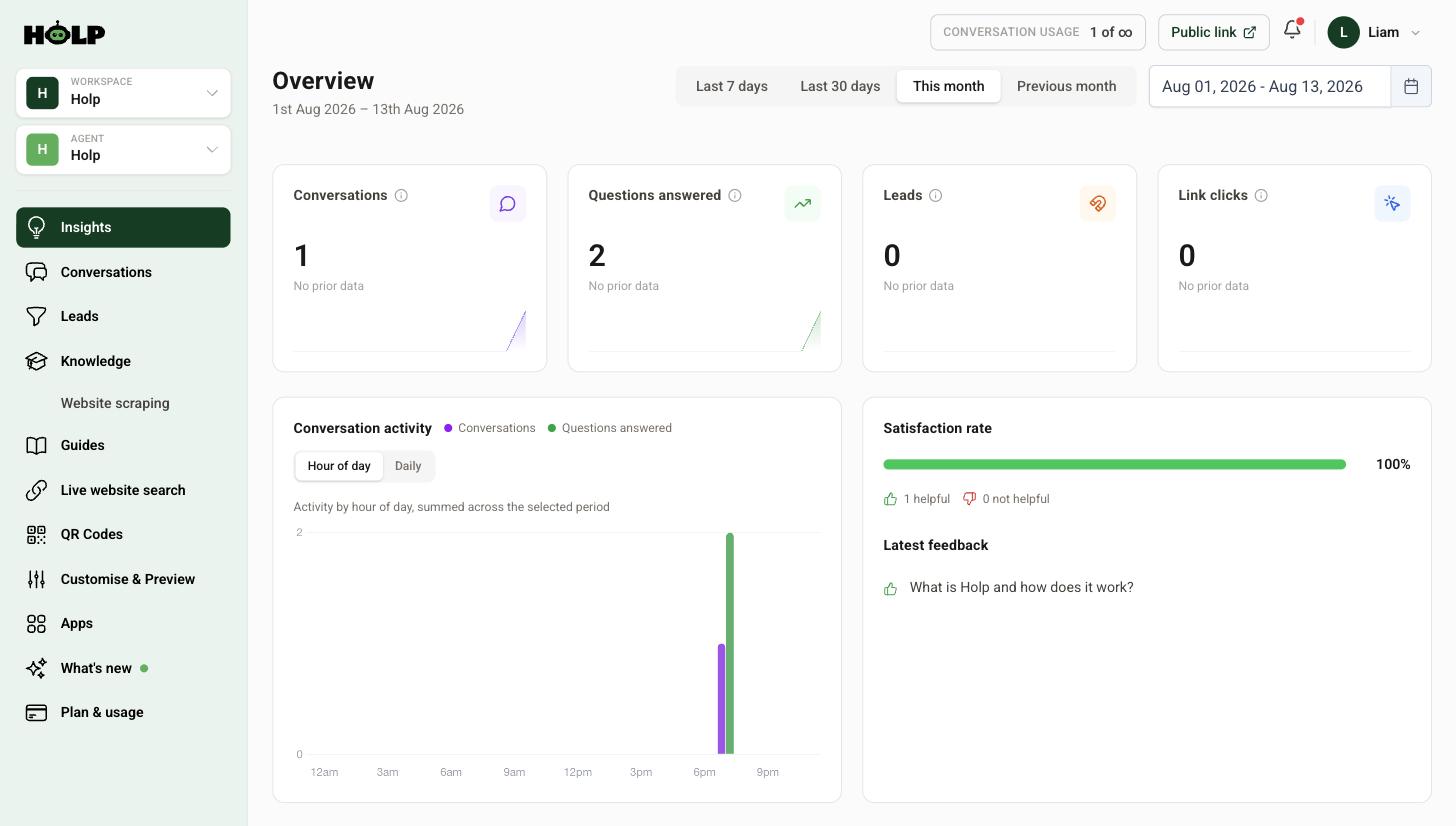
Everything else lives in the left-hand menu:
- Conversations — every chat your assistant has had
- Leads — visitors who left their details or asked for a human
- Knowledge — everything your assistant knows
- Guides — knowledge you have chosen to publish for visitors to read
- Live website search — pages your assistant can read on the fly
- QR Codes — printable codes that open your assistant
- Customise & Preview — how your assistant looks and behaves
- Plan & usage — your subscription and conversation allowance
At the top you will see a workspace and an agent selector. A workspace is your organisation. An agent is a single assistant. Most people only ever need one of each.
Step 2: Give your assistant something to say
An assistant with no knowledge cannot help anyone, so this is the step worth spending real time on. Open Knowledge and you will see everything your assistant currently knows, along with how often each entry has actually been used.
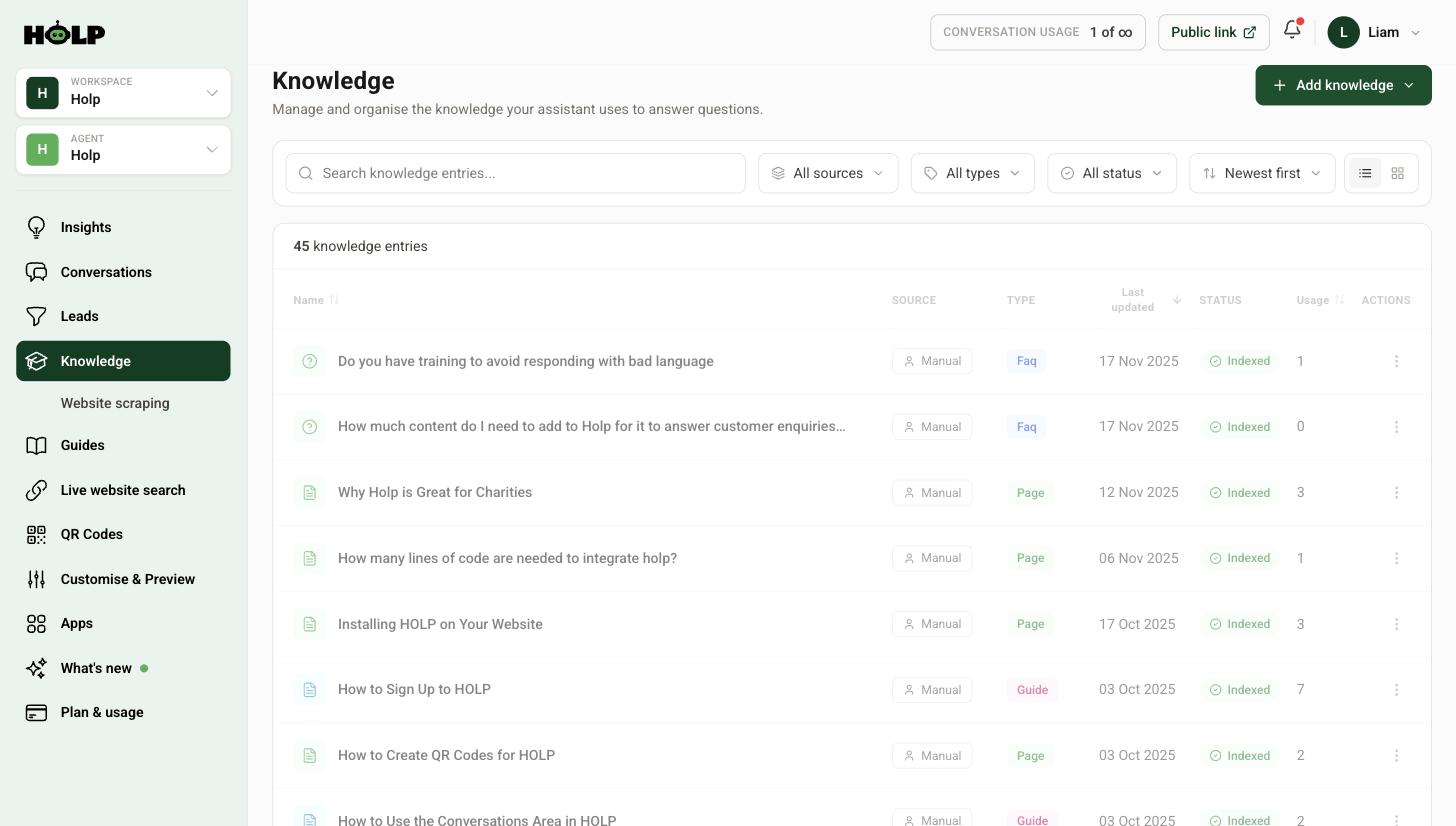
There are three ways to add knowledge, and most people use a mix of all three.
Import your website
The fastest start. Holp reads the pages on your site and turns them into knowledge entries you can review and edit. This gets you from nothing to a usable assistant in minutes. See how to import your website into Holp.
Write entries by hand
The most reliable. Anything customers ask often — opening times, delivery, refunds, how to book — deserves its own written entry, because you control the exact wording. See how to add knowledge to your Holp assistant.
Upload documents
Useful for price lists, policies and brochures that already exist as PDFs. See how to upload PDFs and documents.
A good starting point is roughly twenty to thirty solid entries covering the questions you answer most. You can always add more later — and Holp will tell you what is missing once real visitors start asking.
Step 3: Set the name, tone and greeting
Go to Customise & Preview and open the Identity tab. This is where you decide who your assistant is.
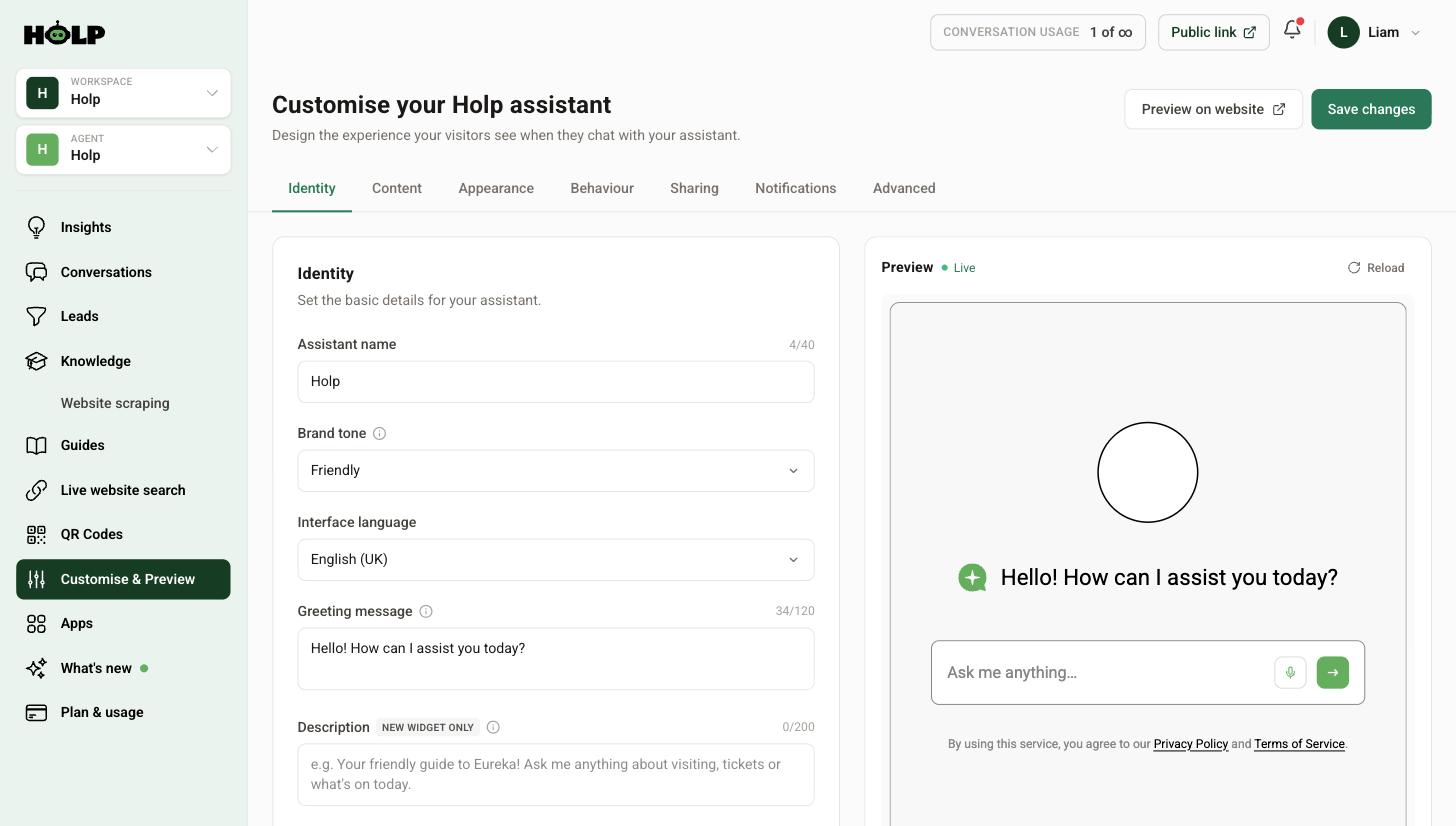
- Assistant name — what visitors see it called. Your brand name works well.
- Brand tone — friendly, casual, formal, professional, playful, or your own description.
- Interface language — the language of the buttons and labels.
- Greeting message — the first line a visitor reads.
A live preview sits beside the settings, so you can see every change as you make it. Nothing goes live until you press Save changes.
More detail: how to set your assistant’s name, tone and greeting.
Step 4: Make it look like yours
The Appearance tab handles branding — your colour, your logo, and where the chat button sits on the page.
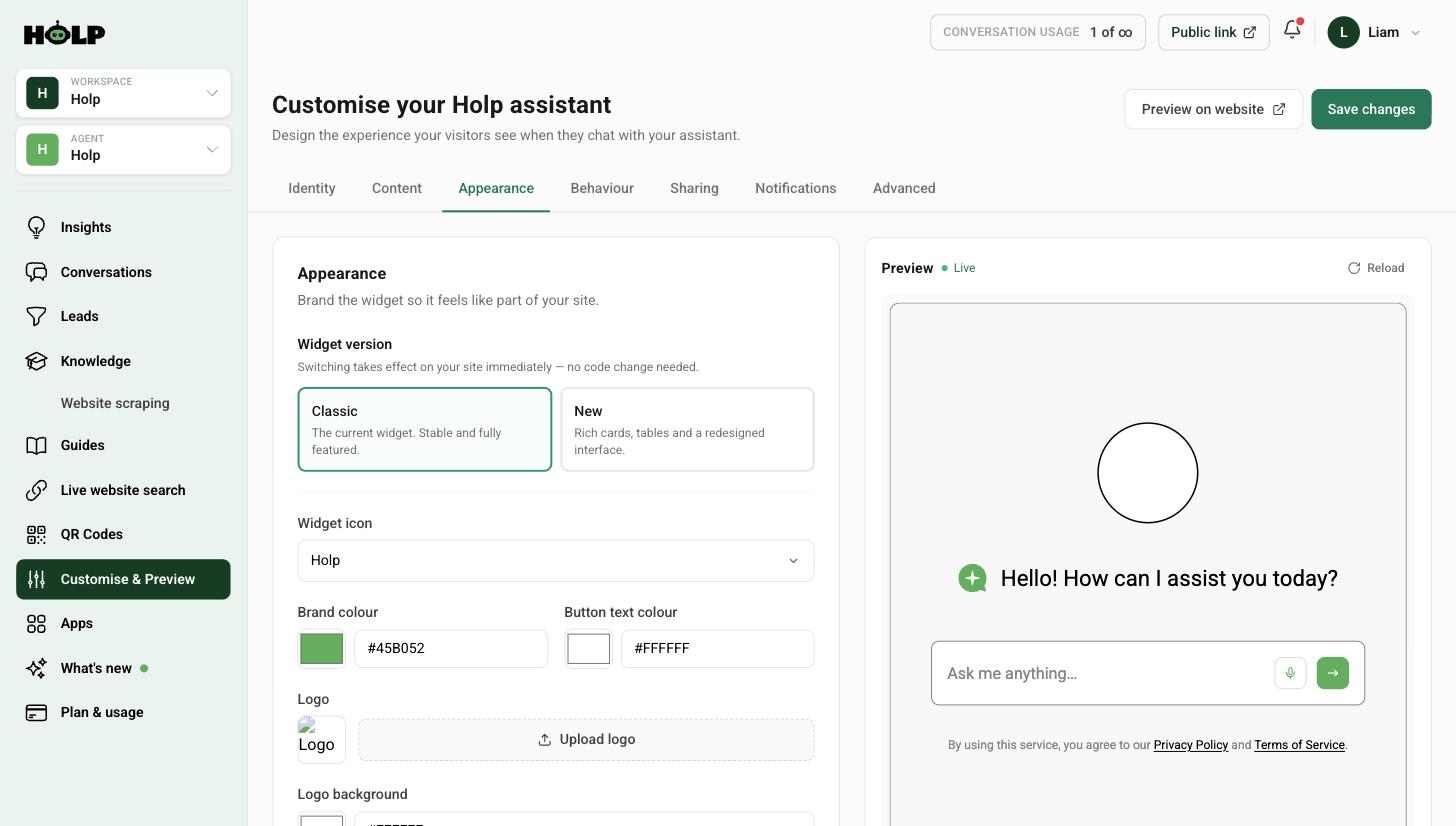
Pick a brand colour with strong contrast against your button text colour so the launcher stays readable for everyone. Full walkthrough: how to brand the Holp widget.
Step 5: Put it on your website
Open the Sharing tab and choose Add Holp to your website. You will get a snippet to paste into your site.
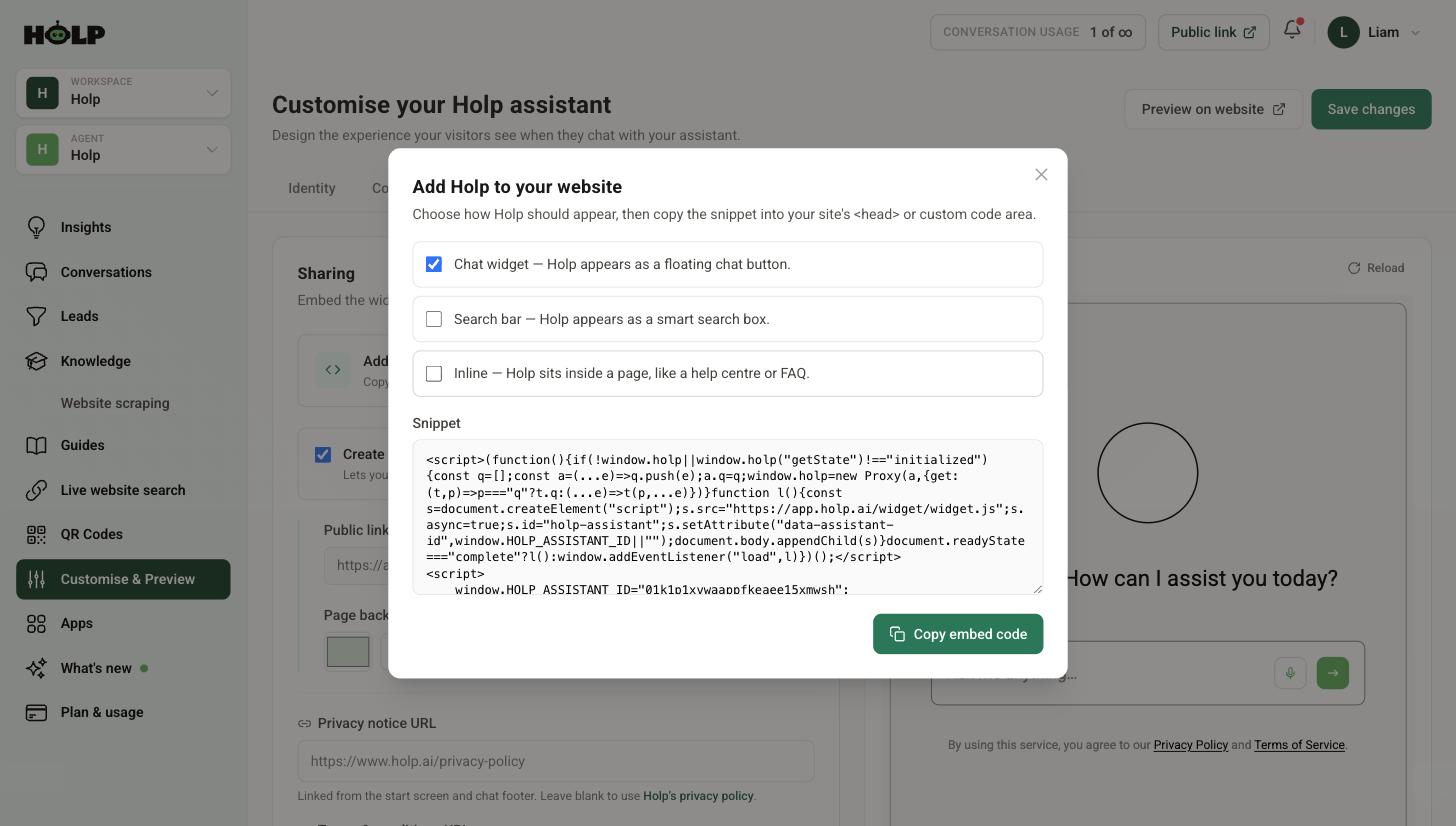
There are three ways Holp can appear, and you can use more than one:
- Chat widget — a floating chat button in the corner. The usual choice.
- Search bar — a smart search box you place on the page.
- Inline — Holp sits inside a page, like a help centre.
Paste the snippet once, into the part of your site that appears on every page — usually a header, footer or custom code area. After that, everything you change in Holp updates automatically. Step-by-step: how to add the Holp chat widget to your website.
No website, or not ready to touch it yet? Turn on a public Holp link instead and share the address directly.
Step 6: Test it the way a customer would
This is the step people skip, and it is the one that catches problems. Open your assistant and ask it the ten questions you get asked most — in the words your customers actually use, typos and all.
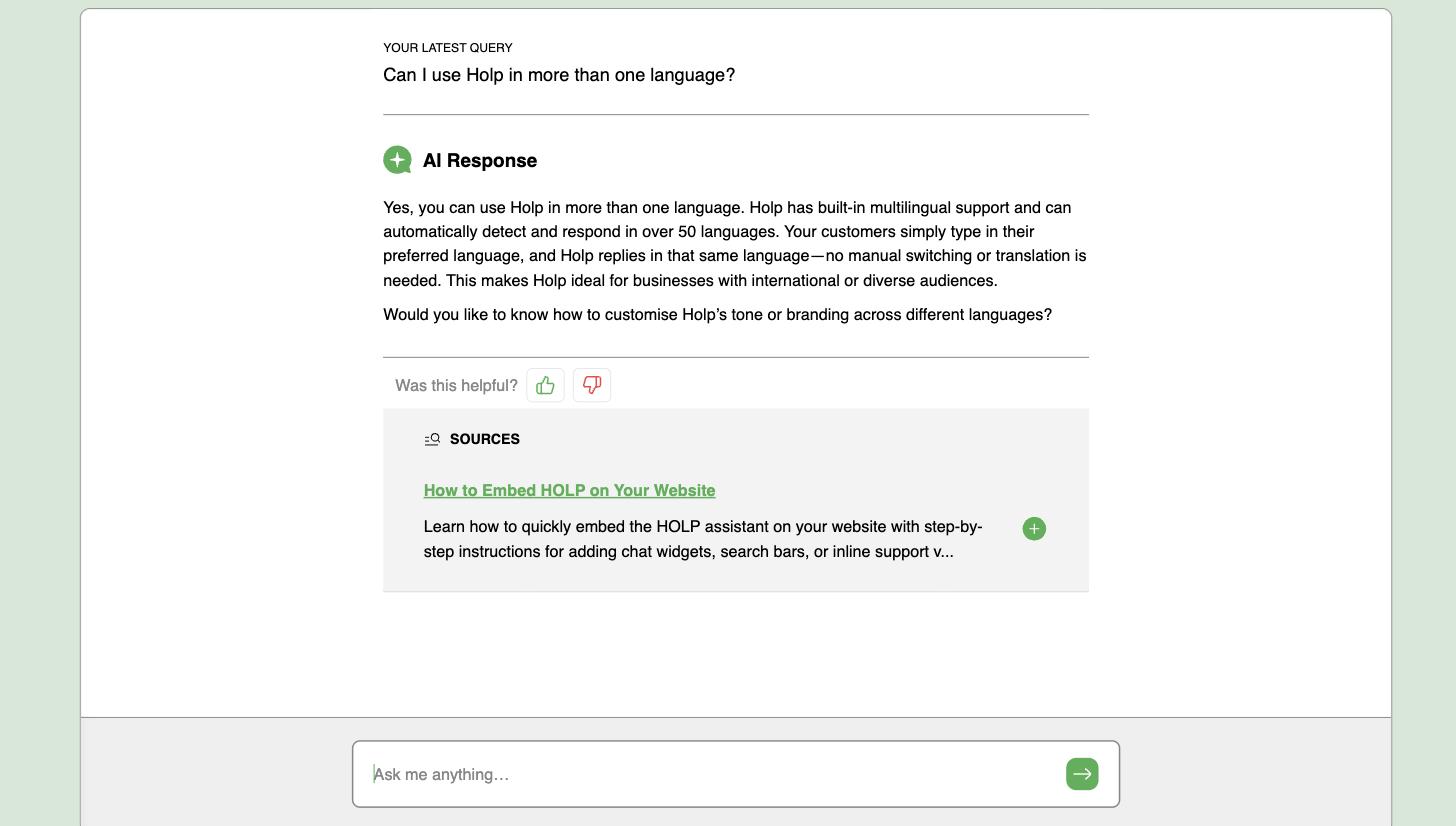
You are looking for three things: is the answer correct, is it complete, and does it sound like you? If an answer is wrong, the fix is almost always in the knowledge entry it used, not in the settings.
Step 7: Come back after a week
Once real visitors are using it, Conversations becomes the most valuable screen in Holp. You can read every chat, see which knowledge entry was used for each answer, and leave private notes for your team.
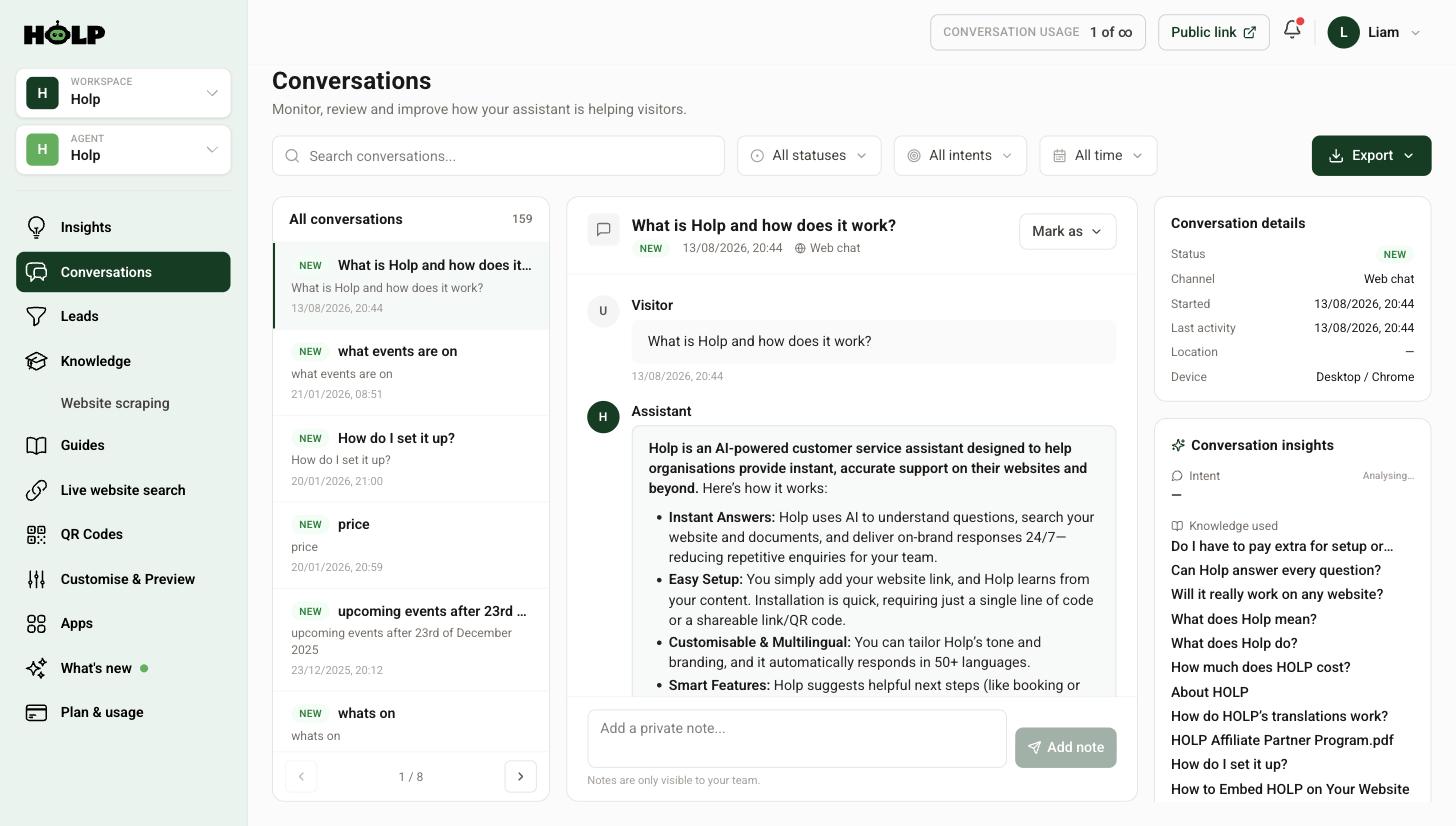
Pay particular attention to knowledge gaps on the Insights screen. These are questions your assistant could not answer — and each one is a ready-made brief for your next knowledge entry. See how to find and fix knowledge gaps.
How long this actually takes
Importing your website takes minutes. Writing a solid set of knowledge entries is the real work — expect an afternoon if you are starting from nothing. Branding and embedding take about fifteen minutes between them. Most teams have something live on the same day and spend the following fortnight refining it based on real questions.
If something is not working
- The chat button is not showing on your site. The snippet usually has not been pasted onto every page, or it has landed somewhere the browser cannot run it. See why the Holp widget is not showing.
- Answers are wrong or vague. Almost always a knowledge problem. See how to improve your assistant’s answers.
- Nothing appears in Insights. Check the date range in the top right — it defaults to the current month.
Frequently asked questions
Do I need a developer to set up Holp?
No. Adding knowledge, branding and testing are all done in Holp itself. The only technical moment is pasting one snippet into your website, and most website builders have a field designed for exactly that. If yours does not, any developer can do it in a couple of minutes.
How much knowledge do I need before I go live?
Enough to cover the questions you answer most. Twenty to thirty good entries is a realistic starting point for most small organisations. Importing your website gets you a base quickly, and knowledge gaps will tell you what to add next.
Can I try it before putting it on my website?
Yes. The live preview in Customise & Preview lets you chat with your assistant as you build it, and a public Holp link gives you a shareable page without embedding anything.
What happens when the assistant cannot answer something?
It says so rather than guessing, and it can offer to pass the visitor to a human. That conversation is then recorded as a knowledge gap so you can fill it. You can also turn on lead capture so the visitor leaves their details.
Can more than one person manage the assistant?
Yes. You can invite colleagues to your workspace so they can add knowledge, read conversations and follow up on leads.
Will it work if my website changes?
Imported pages are re-checked automatically, so your assistant keeps up as your site changes. For pages that must always be exactly current, such as opening times or prices, live website search reads the page at the moment the question is asked.
Does it work in other languages?
Yes. Your assistant replies in the language the visitor writes in, and you can set the language of the interface separately.
Where to go next
- How to add knowledge to your Holp assistant
- How to add the Holp chat widget to your website
- How to capture leads with Holp
- How to review conversations
More from Holp
- What does a chatbot cost? — every pricing model, and the costs nobody lists
- Best AI agents for customer service in 2026 — how the options compare, honestly
- All resources — tools, comparisons and platform guides in one place