How to Customise Your HOLP Assistant
Customising your HOLP assistant is where you make it truly yours. Even without any changes, HOLP works and looks great out of the box, but by adjusting its name, tone, appearance, and welcome message, you can make it feel like a natural extension of your brand.
If you’ve just finished adding knowledge, this is the perfect next step. But if you’ve landed here directly, don’t worry, you can customise HOLP anytime, no matter how much (or how little) knowledge you’ve already added.
In this guide, we’ll walk you through each part of the Customisation page, show how the preview panel updates with your changes, and explain how to share your assistant publicly or add it to your site.
Note: We recommend completing the setup on a desktop computer. While our brochure site works well on mobile, the dashboard is still being optimised for smaller screens.
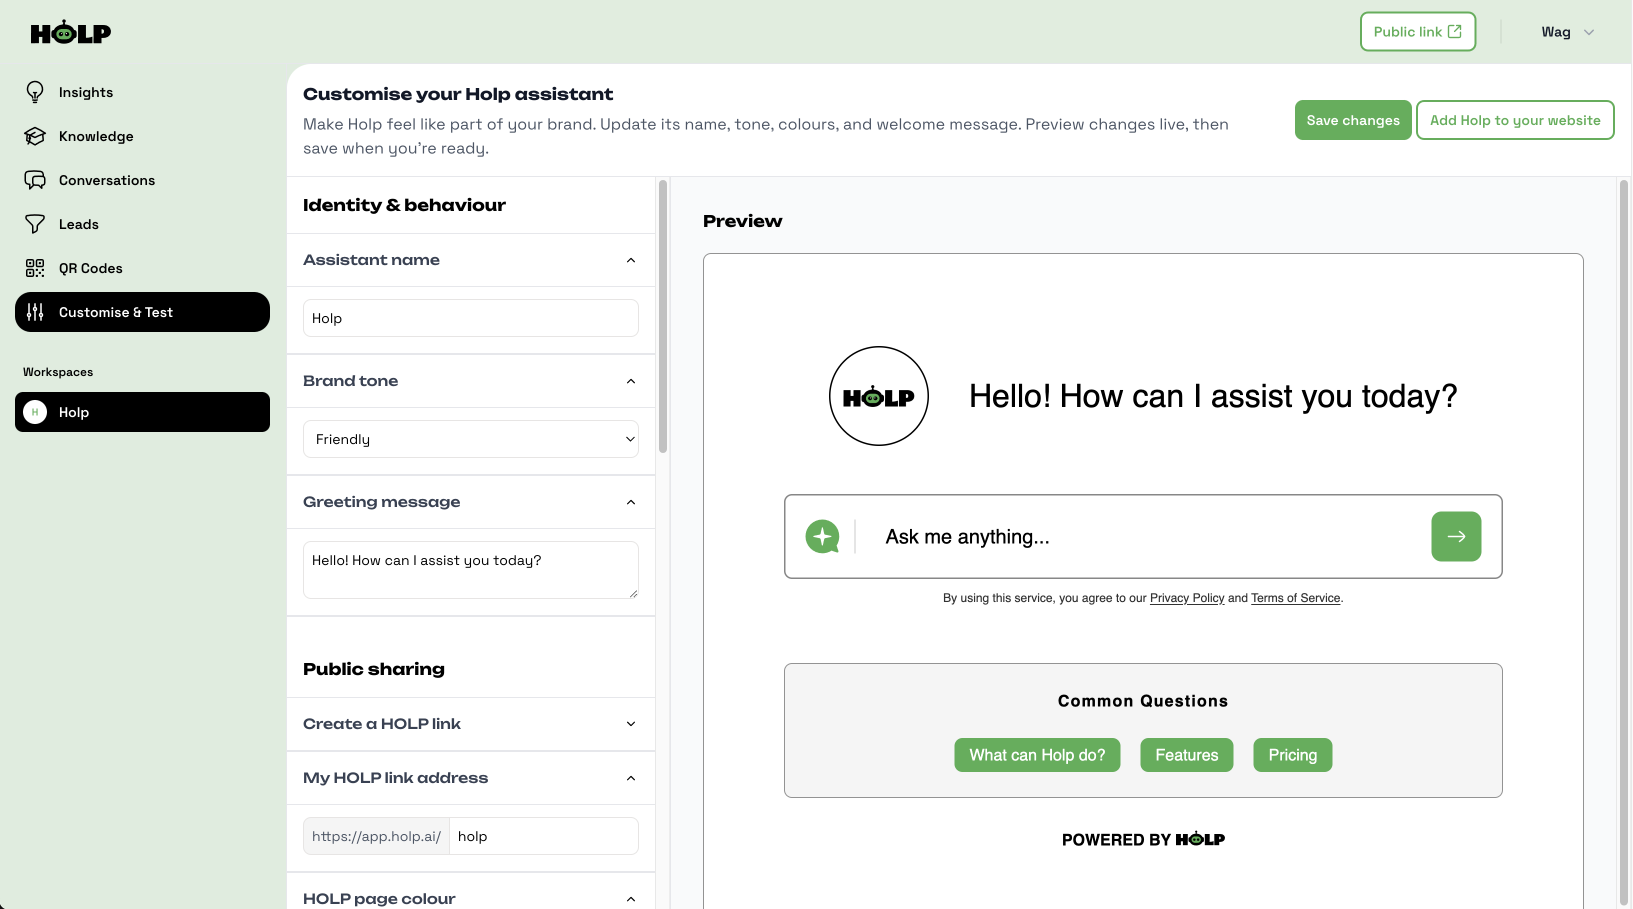
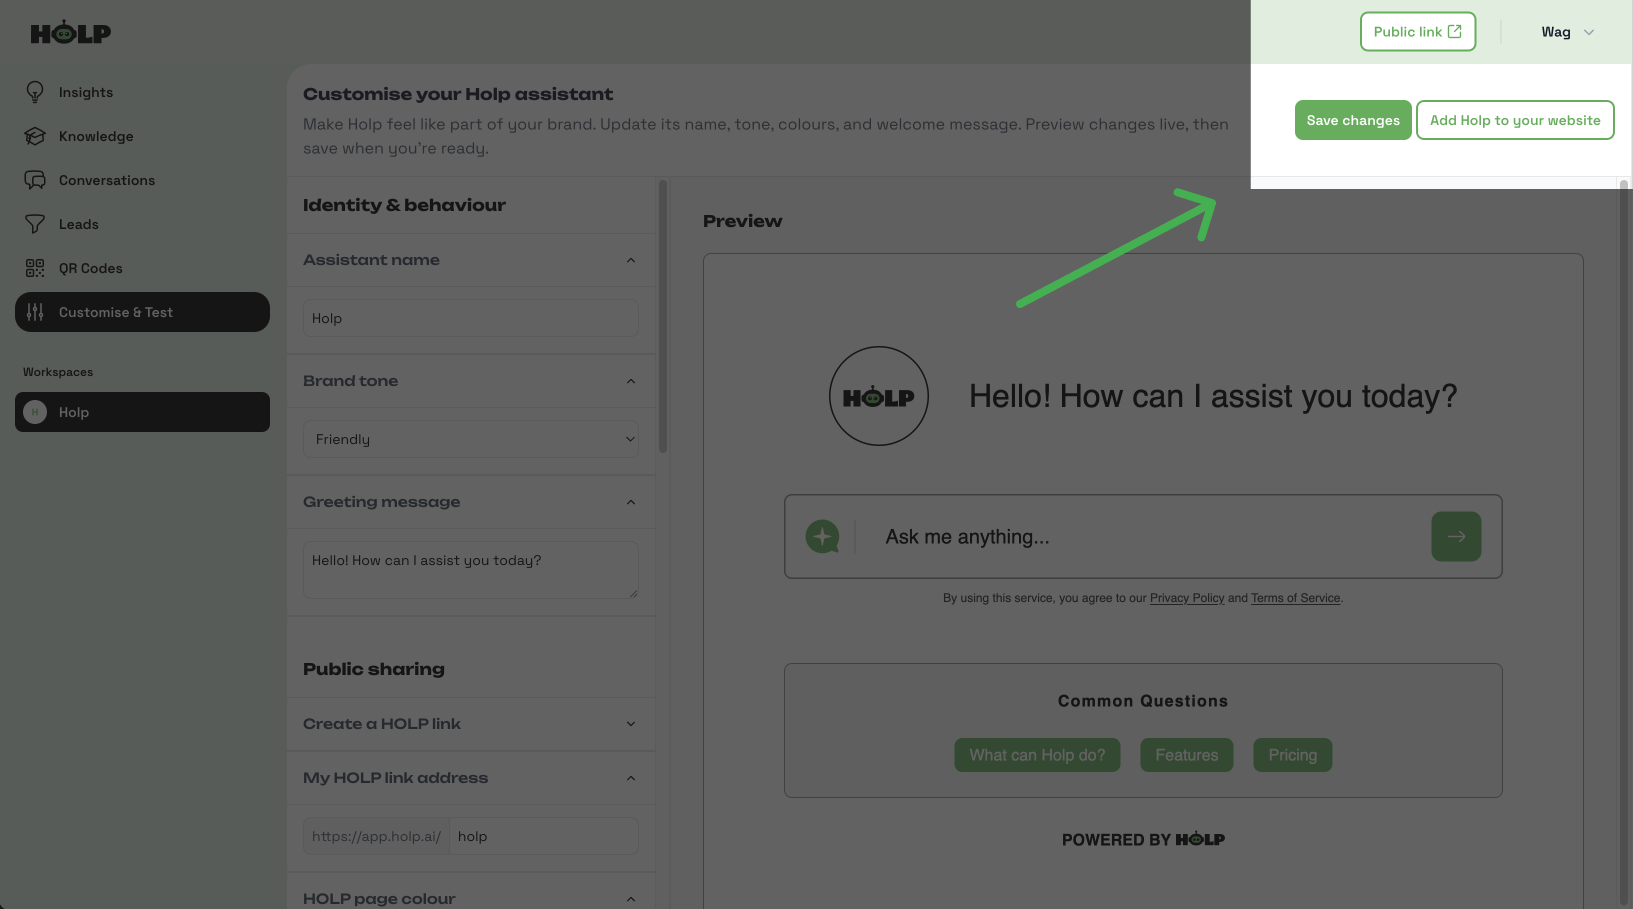
The customisation page
This is the Customisation page, where you make HOLP look, sound, and feel like part of your brand.

Preview & Test
As you make changes, the Preview area on the right updates to show how HOLP will look.
Your changes don’t go live until you click Save.
You can also test HOLP directly here by asking questions — a great way to see how your tone and greeting feel in action.
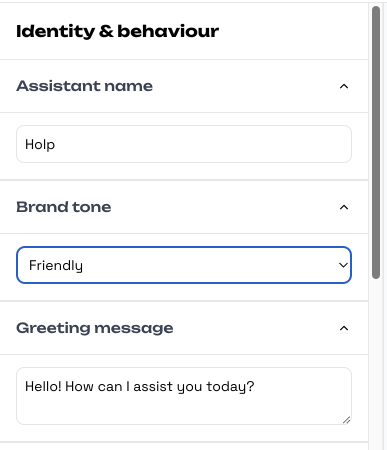
Identity & Behaviour
Start by giving your assistant its name, choosing a brand tone, and writing a greeting message.
The Assistant name is what customers will see when they chat with HOLP.
The Brand tone changes how your assistant speaks (friendly, formal, casual).
The Greeting message is your assistant’s first hello — keep it short and welcoming.


Public Sharing
You can create a public HOLP page to share directly with customers.
Enable Public access to generate your link.
Edit the link address to personalise it (e.g.
holp.ai/mybusiness).Set the HOLP page colour to match your branding.
This is your special HOLP link that can be shared anywhere to open your AI assistant. You can use it in emails, add it to your social profiles, or include it in promotional materials; the world is your oyster.
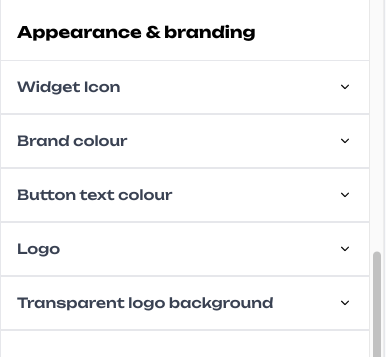
Appearance & Branding
Now customise HOLP’s look so it blends seamlessly with your site and brand. Review the preview panel as you make changes to see how it looks:
Widget icon → Choose the chat button style or keep the default one. There are five to choose from.
Brand colour → Select your main brand colour.
Button text colour → Make sure text and icons are easy to see.
Logo → Upload your business logo.
Transparent logo background → Select a colour of the background if your logo is transparent.
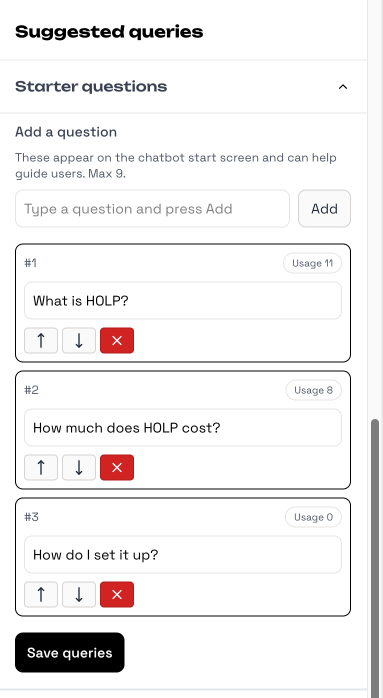
Suggested Queries
Add up to 9 starter questions. These appear in the Common Questions section underneath the chat field. They help guide people and spark interaction. For example:
What are your opening hours?
How much does it cost?
Do you offer bulk discounts?
You can add up to 9, but I suggest adding only 3-4 to avoid overwhelming people.
Make sure to click the Save queries button at the bottom once you’ve added them.
Save Your Changes
Once you’re satisfied with the identity, branding, and starter questions, click 'Save changes’. Your assistant is now customised to match your brand.
You’ll notice a Public Link button in the top right. This opens your HOLP in a browser window; this is your special HOLP Link you can share, anywhere you want.
You’ve finished customising HOLP
That’s it — you’ve now customised HOLP to reflect your brand’s identity and style. From its name and tone of voice to its colours and starter questions, your assistant is ready to meet customers in a way that feels natural and on-brand.
Next, we’ll move on to the Embedding HOLP on Your Website guide. There, you’ll learn how to take the embed code and place HOLP directly onto your site, so visitors can start chatting with your assistant right away.
👉 Remember, you don’t have to embed HOLP into a website. You can also use the Public link at the top of your dashboard.